Teacher Version


Removing Configuration

This is the custom robot that appeared in the previous video. By default, this robot uses 3 motors to move.
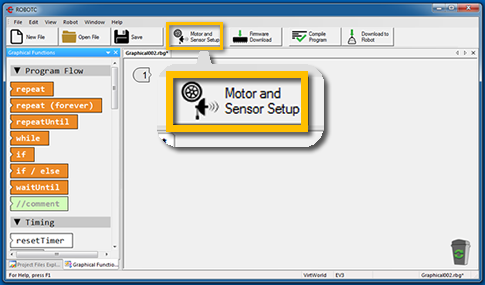
Open the Motor and Sensor Setup window by clicking on the "Motors and Sensor Setup" button at the top of ROBOTC.
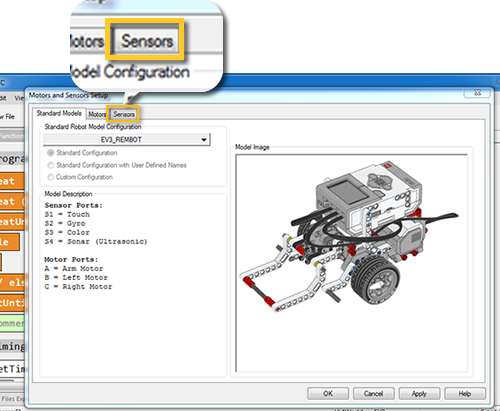
On Motors and Sensors Setup window, click and open the "Sensors" tab.
On the Sensors tab, look for sensors that you do not need. For example, to remove Ultrasonic Sensor, click on the drop-down menu "Ultrasonic (EV3)", listed under 'Sensor Type'. Then, select No Sensor.

Repeat this for other sensors you would like to remove.
More Configuration Removal
Open Motors and Sensors Setup, configure a different sensor in a non-default port.

Though the Custom Robot uses 3 motors to move, it is possible to use a Touch Sensor too.
Complicated robot designs often restrict you physically from attaching extra sensors freely. In cases like this, changing the sensor's default port can be useful.

In the Sensors tab, of Motors and Sensor Setup window, look for a sensor name "touchSensor". You will see that it is placed in port 1.
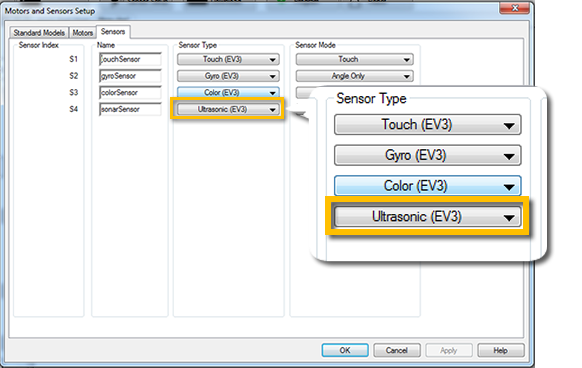
You wouldn't want to replace a port that is already occupied. Look for ports that are empty (marked as "No Sensor"), or ports using sensors that you do not need. For instance, this robot does not use the ultrasonic sensor, so it is safe to use this port.
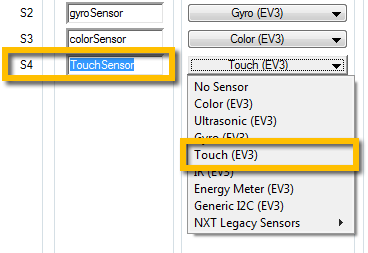
Choose port 4, which by default is the Ultrasonic Sensor, type in "TouchSensor" as the name of the sensor, and select "Touch (EV3)" from the dropdown menu.
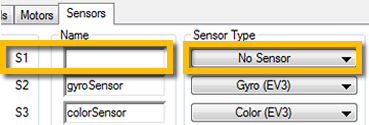
Make sure port 1 is now empty, and set as "No Sensor". Click on the Apply button on the Setup Window to complete the change.